UPnP Media Server
QNAP Turbo Station’s UPnP Media Server :
A. A better way to enjoy digital media
Many of us may acquire mp3 files and digital video files by downloading from the Internet, sharing among friends, capturing home videos on our cam coders, or converting files from CD. Besides playing the files by computer directly, there are better ways to enjoy these digital contents. DLNA DMP (Digital Media Player) devices are now popular in the market. With DMP, we do not need to play music or view pictures on the computer. These digital contents can be transferred from PC to a DMP device, and then to output into the stereo acoustic system or TV via the network. For instance, the mp3 files in the computer can be played by your HiFi. You can play movies or digital pictures on your LCD TV.
The application is illustrated as below:
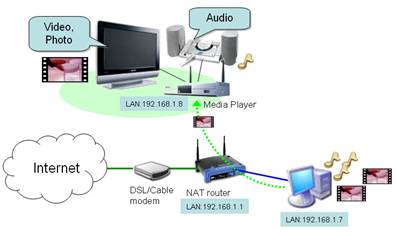
For this application, you have to install the software provided by the DMP manufacturer on your computer and connect to the LAN, your PC can become an UPnP DMS (Digital Media Server). You have to turn on the computer continuously to let your DMP find the DMS of your computer in LAN and play the music or multimedia files.
The application of DMP in the above example provides us a better way to enjoy digital contents. However, there are some defects:
- You have to turn on your computer non stop. When listening to the music, you may be disturbed by the noise from the computer fan.
- Turning on the computer 24 x 7 consumes lots of electricity.
- Music and video playing will be interrupted if you are using the computer and need to perform system restart or other operations.
B. Setup Example- Use QNAP’s Turbo Station
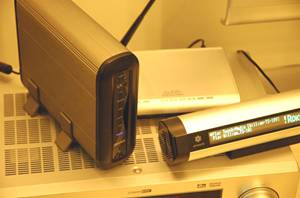
B-1. Brief introduction of QNAP Turbo Station- TS-109
- QNAP Turbo Station series (TS-109) is a unique fanless and noiseless server ideally for home and SOHO users.
- TS-109 adopts the latest Marvel 5182 chipset for the extra high performance (actually is the highest performer of its class)
- TS-109 series has built-in TwonkyMedia UPnP media server, which is the most complete and powerful UPnP/DLNA compliant media server. Besides, there is also Internet Radio function that users can listen to the music from worldwide stations.
- More than a pure storage, Turbo Station is also an All-in-one server. It provides 12 useful server functions and all of them can be set up simply by web browser. (All-in-one Servers includes File Server, Ftp Server, P2P Download Station, Multimedia Station for photo sharing, iTunes Server, Backup Server, Printer Server, optional RAID-1, Remote Replication, Web Server with PHP & MySQL/ SQLite support, etc.)
B-2. The advantages of using Turbo Station as your UPnP Media Server:
- Simple activation: The UPnP media server embedded in Turbo Station can be enabled simply by a single click. No extra software is necessary.
- Stable and energy-saving: Turbo Station adopts embedded hardware design which is stable and energy-saving. The power consumption is about 14.4W. Compared to a PC server, Turbo Station helps you save electricity expense in a large extent.
- Silent: Turbo Station uses aluminum alloy case for heat dissipation and employs fanless design which is absolutely quiet to use. You can turn on the server for 24 hours and the server will not generate any noise to disturb your work or rest.
- Small-sized, occupies small space only. It is easy for you to place it anywhere.
- Complete backup options and other attractive features: Besides to share the content by Turbo Station, it provides advanced “remote replication” and “QRAID-1” instant backup and restoring technology to provide a more complete backup choice.
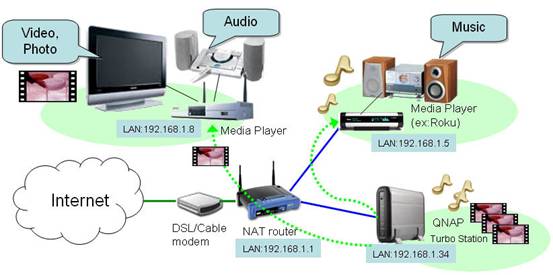
C. How to Set Up Your NAS and DMP
- Install a hard disk to Turbo Station and finish initialization according to the Quick Installation Guide.
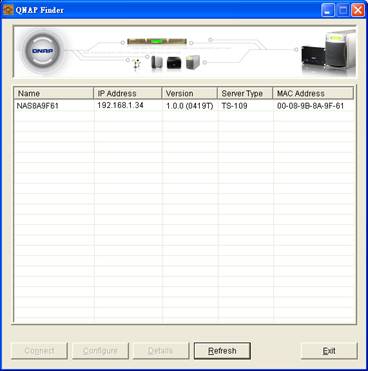
- Make sure you have connected a PC and Turbo Station to the same LAN. Execute QNAP Finder (the configuration utility provided by QNAP) to find your QNAP Turbo Station in LAN or enter http://Turbo Station IP:8080/ (8080 is the default configuration port of TS-109 series, for TS-101 or TS-201 please use port 6000) in the web browser directly to enter Turbo Station’s administration page.
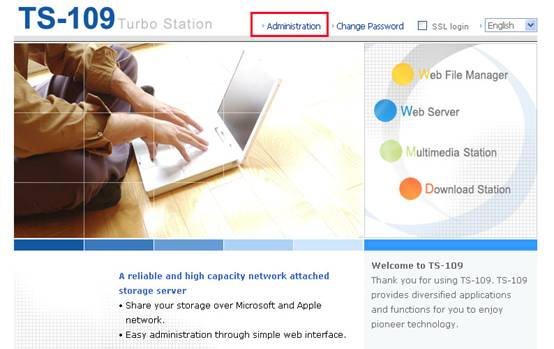
- Click “Administration” to enter the administration page.
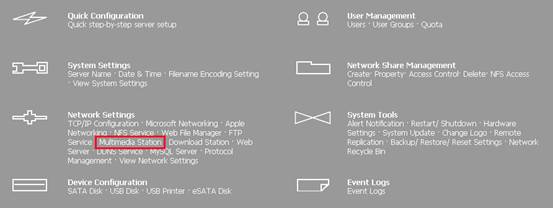
- Enter “Network Settings> Multimedia Station” page and check the box “Enable UPnP Media Server“.
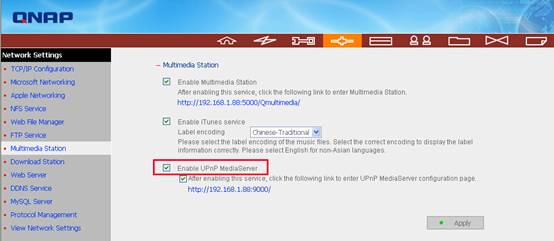
When you check the box “Enable UPnP Media Server” and click Apply, the function is ready to use! The UPnP Media Server is activated immediately.
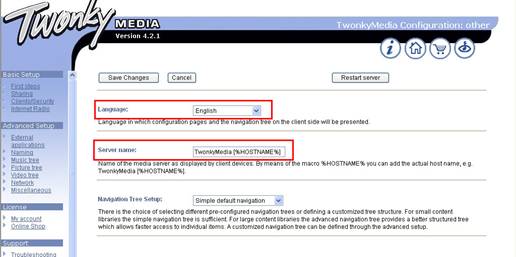
- When you click on UPnP Media Server link (port 9000) http://TurboStation IP:9000/, you will enter TwonkyMedia configuration page. You can customize the settings on this page. (TwonkyMedia Server is available on TS-109, TS-209, TS-101 and TS-201)
- You can select the display language in configuration pages.
- Enter the name of the UPnP Media Server of Turbo Station. This name will be displayed on the operation interface of DMP.
- In Content Locations, you can select the folders to be shared to DMP (default folder is Qmultimedia). In the example, we added the directories /Qmultimedia and /Qdonwload.
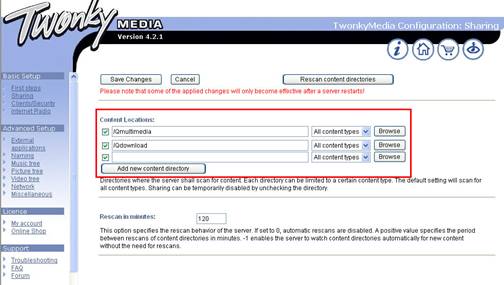
The contents on Turbo Station will be displayed on your DMP according to your settings. When you have completed configuration, make sure you have clicked the button Save Changes to save the settings.
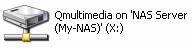
- You can move the mp3, pictures or video to Qmultimedia folder or any specified folders on Turbo Station for DMP to play. You can upload the files by My Network Places in Windows (Key in the path in your browser: \\192.168.1.34\ to access to the folder) or by FTP. Turbo Station will be shared on the network.
D. Set up the Connections of Your DMP
The following example introduces how to install your DMP device:
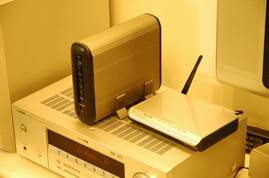
D-1. Connect your DMP to local LAN.
- About physical wiring:
DMP is used to receive the streamed multimedia file sent by your UPnP Media server on NAS, then transcode these files to your TV or Hi-Fi system to play. Because of the limited cable length of these interfaces, normally you have to place your DMP near your TV and Hi-Fi system. Better to have an Ethernet connector near your TV, otherwise you need to use DMP’s wireless connection to access to home network.

- About TCP/IP settings:
Simply connect your DMP device to the LAN at your home and set to acquire the IP address by DHCP. (Most of the DMP devices are defined as DHCP client, it will automatically be assigned an IP address when connect to your home network)
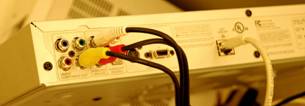
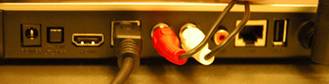
D-2. Connect video and audio output of DMP to your TV.
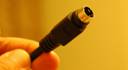
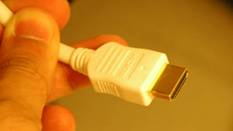
There might be different video and audio interfaces provided by DMP devices, such as Composite video/audio output, S-Video for video output, S/PDIF digital audio, or the latest HDMI interface which can carry both video and audio signals.
| (HDMI) | (S-Video) |
 |
 |
Example of Installing DMP Devices
The built-in TwonkyMedia UPnP Media Server on TS-109 is compatible with lots of DLNA DMP devices in the market. Check the compatibility list in TwonkyVision’s website. http://www.twonkyvision.com/Products/TwonkyMedia/devices.html.
-
- Example 1 (Buffalo LinkTheater is used).
- In this example, the video out and audio out cables are connected to the TV. You can also connect audio out to your stereo acoustic system.
- Turn on the TV that is connected to the DMP, you can select the options available by the remote control of the DMP. The DMP will find Turbo Station on the network. An option “My TS-109” will be displayed on the screen.

(Turn on the TV, My Turbo Station will be shown on LinkTheater screen.)
- You will find the photos, video and music shared by the specified folder on Turbo Station. You can use the DMP remote control to select and play the files.

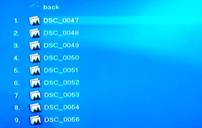
(You can select the music, picture or video shared by Turbo Station)
(Select the picture you want to play)

(DMP will play your photos automatically)

(You can also play the mp3 files)
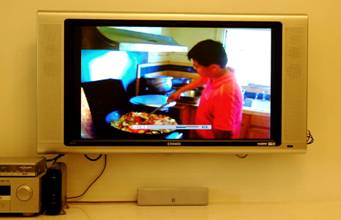
(The video files saved on TURBO STATION can also be played on TV)
-
- Example 2 (ZyXEL’s DMA-1000W is used).
HDMI interface start to appear in some DMP devices. ZyXEL DMA-1000W is one of the models which are based on SigmaDesigns’ platform. (At the time of writing, ZyXEL’s DMA-1000W is in beta phase)
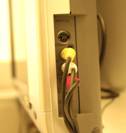
- If there is HDMI interface provided on your TV, both audio and video signals can be carried by the single cable. Simply connect your DMP to your TV by using HDMI cable.
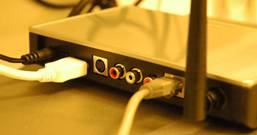
- If you don’t have HDMI interface available on the TV, you can also connect S-Video cable to your TV for video output, and connect Composite left/right audio interface for audio output. If you demand higher quality of music, you can connect by using S/PDIF cable to your HiFi system.
-
- Turn on and switch your TV to the selective interface (e.g. HDMI or S-Video).
- Use your remote of the DMP. Select to enter the “Server” page, you will find your Turbo Station is automatically found by your DMP.

- You can then select to enjoy the videos or photos on your TV, also to play your MP3 music or Internet Radio streamed from your Turbo Station.
Conclusion
The UPnP Media Server of Turbo Station enables you to save mp3 and other multimedia files collectively on Turbo Station and share these files on LAN. With DLNA DMP device, the files can be played by stereo acoustic system and LCD TV independent of PC. Moreover, Turbo Station’s energy-saving, fanless, and aluminum alloy case design enable absolutely silent and stable performance. It is small-sized, stylish, and an ideal choice for setting up digital home environment.
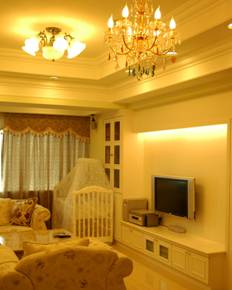
(Illustration: Turbo Station can run 24×7. It is absolutely silent and energy-saving. Even if Turbo Station is located near a crib, it will not disturb your baby.)