Share Your Digital Photos
How to Back up & Share Your Digital Photos by QNAP Turbo Station :
Backup digital photos
Digital camera is widely used nowadays. Most people have large amount of digital photos saved in their PC or notebook for easy access. However, in case the computer is lost or the hard disk crashes, all precious memories will be gone. Some people who have a stronger sense of data backup may back up their digital photos by CD-R burning. Nevertheless, CD-R burning is time-consuming. It is also inconvenient to view the pictures and preserve the files. The discs can be easily scrapped and all the data will be lost.
Create Your Digital Photo Album and Backup by Turbo Station
QNAP Turbo Station provides a new choice for digital photo backup. Turbo Station is a NAS with multiple server functions. Simply move the photo files to the folder Qmultimedia on Turbo Station, you can create a photo album which can be browsed by web browser. Turbo Station also supports photo backup and network sharing functions.
Advantages of using Turbo Station for digital photo backup:
- Simple activation: By enabling Qmultimedia function of Turbo Station in one click, the album will be activated immediately. No extra software is necessary.
- Easy to view and share: When you upload the original photos to Qmultimedia folder of Turbo Station, the server will generate small thumbnails in JPEG automatically for convenient viewing and speed up browsing time. The details of each photo, e.g. date, resolution, focal length, aperture will be shown on the web interface, which is very convenient.
- Stable and energy-saving: Turbo Station adopts embedded hardware design which is stable and energy-saving. The power consumption is about 15~25W. (14.4W only for 1-bay NAS)
- Silent: Turbo Station uses aluminum alloy case for heat dissipation and employs fanless design which is absolutely quiet to use. You can turn on the server for 24 hours and the server will not generate any noise to disturb your work or rest.
- Small-sized, occupies small space only. It is easy for you to place it anywhere.
- Complete backup options: Besides backup of photos by uploading the files to Turbo Station, Turbo Station provides advanced “remote replication” and “QRAID-1” instant backup and restoring technology to provide a more complete backup choice.
How to configure:
A. Set up Turbo Station in a few simple steps
- Install a hard disk to Turbo Station and finish initialization according to the Quick Installation Guide.
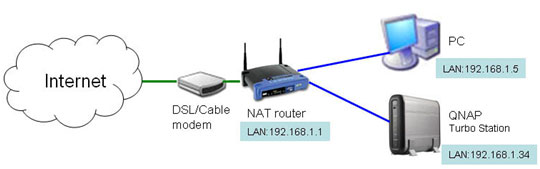
- Make sure you have connected a PC and Turbo Station to the same LAN. Execute QNAP Finder (the configuration utility provided by QNAP) to find your QNAP Turbo Station in LAN to enter Turbo Station’s web administration page.
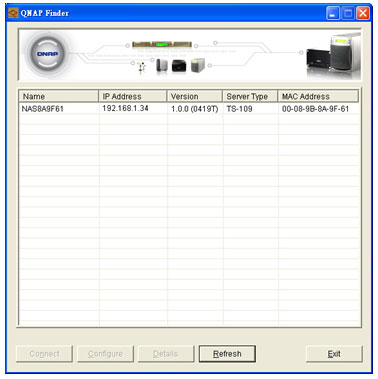
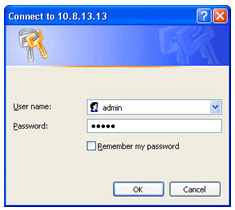
The server will pop up a window and prompt for user name and password. (TS-109 and TS-209’s default user name: admin, password: admin).
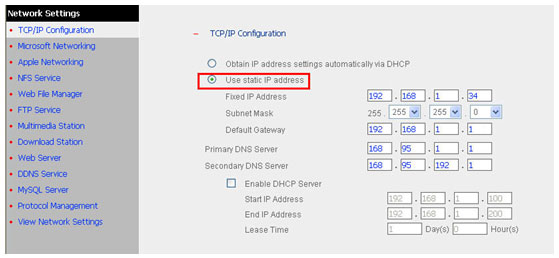
- It is recommended to assign a fixed IP to Turbo Station. (Since you may need to open the ports of some services on your NAT router and forward them to the fixed IP address of Turbo Station.) Go to Network Settings>TCP/IP Configuration. If your gateway address is 192.168.1.1, you can assign a fixed IP to Turbo Station, e.g. 192.168.1.34, and set the subnet mask as 255.255.255.0. Note that the LAN IP of Turbo Station should be in the same LAN of the NAT router.
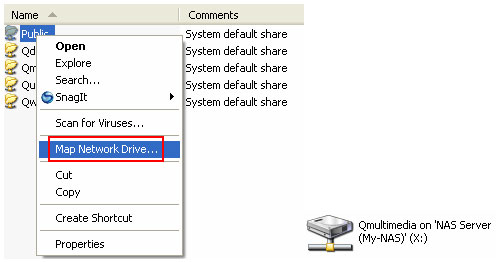
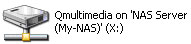
- You can move your photos to “Qmultimedia” folder on Turbo Station. You can upload the files by My Network Places in Windows (Key in the path in your browser: \\192.168.1.34\ to access to the folder and then you can right click the mouse button to map the selected disk drive). You can then drag and drop files to and access the files on Turbo Station directly.
B. Finish the IP sharing router settings (DDNS and port forwarding settings)
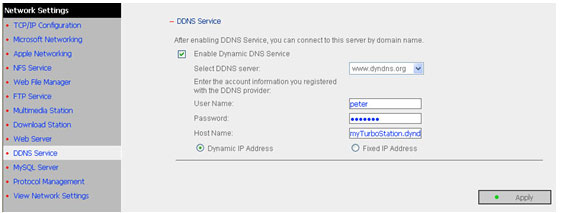
- DDNS (Users using fixed IP for Internet connection might not need this service)
Most ISP will provide one or more dynamic public IP for Internet connection. (This applies to the situation that the IP sharing router acquires WAN IP from ISP by PPPoE or DHCP connection.) To set up a server, a fixed IP address or URL is necessary so that users can easily recall the server address to connect to. When a dynamic IP address is used, you can use a DDNS supported IP sharing router with Turbo Station or use Turbo Station’s DDNS function, and register an easy-to-remember address from DDNS provider to identify Turbo Station on the Internet, e.g. myTurboStation.dyndns.org.
If you are using your Turbo Station without being behind an NAT router, you can also configure to use the DDNS function on Turbo Station.
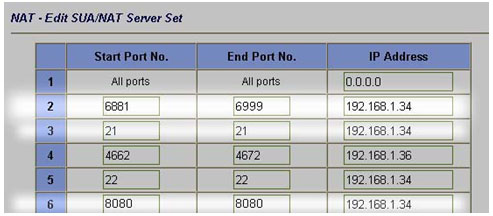
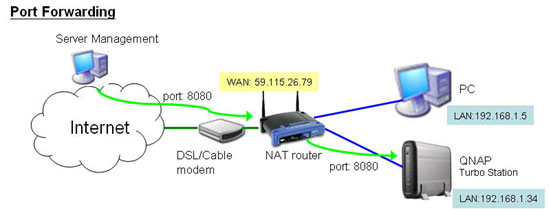
- Port Forwarding
If your Turbo Station is located behind the NAT router, you need to open the ports of some services on the NAT router and forward these ports to the fixed LAN IP of Turbo Station. This function is available on most routers in the market and is often known as “Port Forwarding“, “NAT Server” or “Virtual Server“. You have to forward port 8080 to the LAN IP of Turbo Station (TS-109 and TS-209’s default management port is 8080, e.g. forward port 8080 to 192.168.1.34; for TS-101, TS-201, or TS-100 please forward default port 6000). All external packets from port 8080 received by your NAT router will be forwarded to the LAN IP of Turbo Station.
PS: Some NAT routers provide DMZ settings. You can forward LAN IP address specified by DMZ to Turbo Station. When this setting is used, all ports from WAN to LAN will be forwarded to Turbo Station.To share your album with friends and family via the Internet, after completing these settings, your Turbo Station album can be accessed via the Internet http://myTurboStation.dyndns.org:8080/Qmultimedia/.
C. Step-by-step Configuration of Your Digital Photo Album
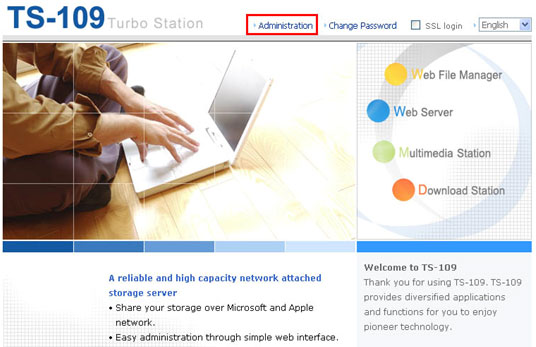
- Enter the administration page of Turbo Station:
� Click Administration to enter the administration page. The server will pop up a window and prompt for user name and password. (TS-109 and TS-209’s default user name: admin, password: admin, for TS-101, TS-201, and TS-100 the default user name and password are administrator: admin).
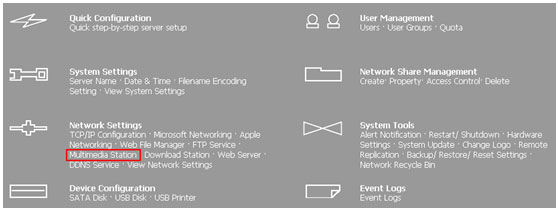
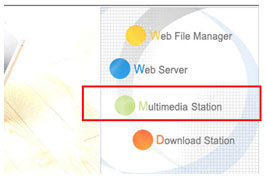
- Enable Multimedia Station service
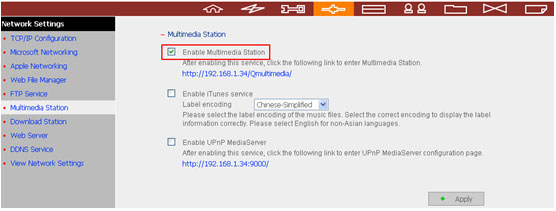
� Go to Multimedia Station page in Network Settings.
� Check the box “Enable Multimedia Station” and click Apply. Multimedia Station is ready to use.
- Upload photos
There are several ways to upload your photos to the Qmultimedia folder on Turbo Station.
<1> By FTP: This is the fastest way for you to upload all photos to Qmultimedia folder. (Make sure FTP server is enabled. Please refer to FTP server settings.)
<2> By My Network Places in Windows: Drag and drop the photos to Qmultimedia folder.
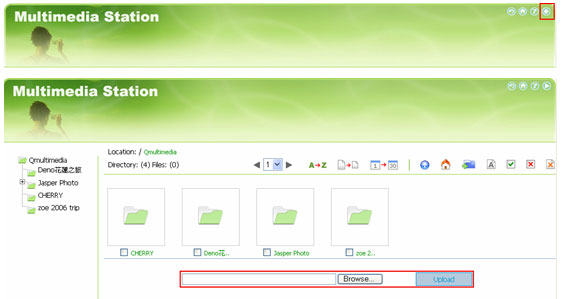
<3> Go to Multimedia Station page, click the login button and login the service with an account of administrator authority. You can then upload photos by web browser (the photos must be uploaded one by one).
<4> You can also login Web File Manager and upload the photos one by one.
- Define access authority of your photo album
The latest firmware of TS-109 and TS-209 series enables users to define access authority of web-based Multimedia Station.
Please note that the authority here is different from the file access right of Qmultimedia folder. It is only for access right control for Multimedia Station service.
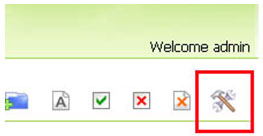
When you enter Multimedia Station, you are treated as a “guest” before logging in. Click the login icon. The server will pop up a window and prompt for user name and password. Please login by the system administrator’s account. (Default user name: admin, password: admin)

After you login as admin, please click the icon “Configure album authority” to manage the access right. You can define the photo folders to be shared under QMultimedia folder.
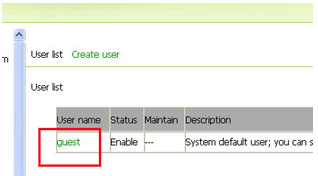
Before you create new user accounts, there is only one system default account, i.e., “guest”. (All the web access to Multimedia Station before login is treated as “guest“). Please move the folders open for guest access to the accessible album list by clicking the “Add” button.
Note, please remember to click the “Submit” button to save the changes.
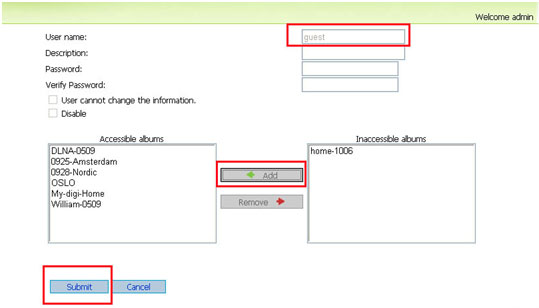
In this example, the folder “home-1006” is not in the list of Accessible albums. If you connect to Multimedia Station by “guest”, all the folders will be shared except the “home-1006”.
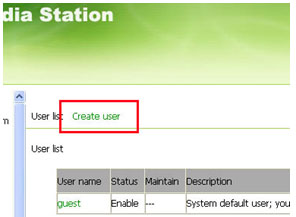
You can also click “Create User” to add a new user, and define password and the access right of the user.
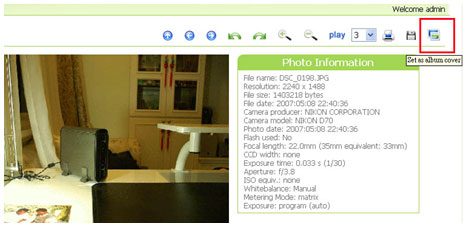
Besides, you can set a picture as your album cover. Simply click the icon “Set as album cover“, and then it goes.
These new enhancements are very useful. They enable you to share your photos to different friends with different access right. - Browsing and sharing
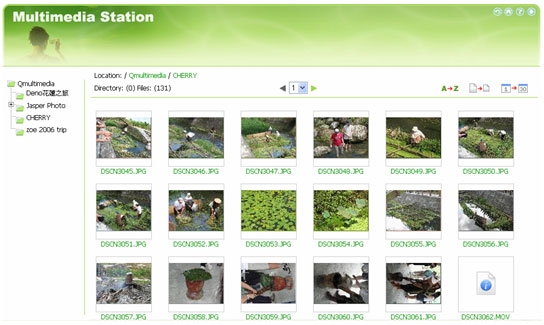
After uploading your photos to Qmultimedia folder, it may take a while to generate thumbnails for preview. (Turbo Station will create thumbnails at 03:00 system time every day. After the thumbnails are created, you can login Multimedia Station and enjoy the convenient web-based photo album.Structure organization:
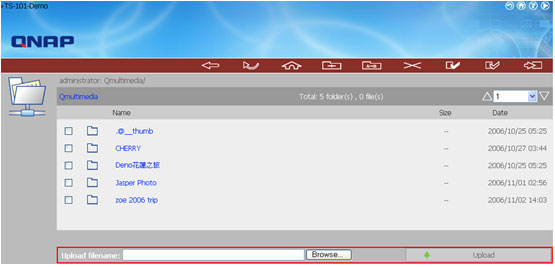
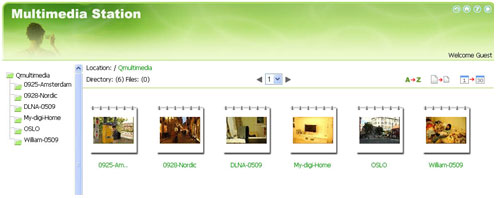
Select a folder and click on it. The thumbnail of each photo will be shown, which is very convenient for browsing.
Click on the thumbnail and a larger thumbnail of that photo will be shown immediately. The details of the photo will be displayed, e.g. file name, resolution, size, date, flash, aperture, focal length.

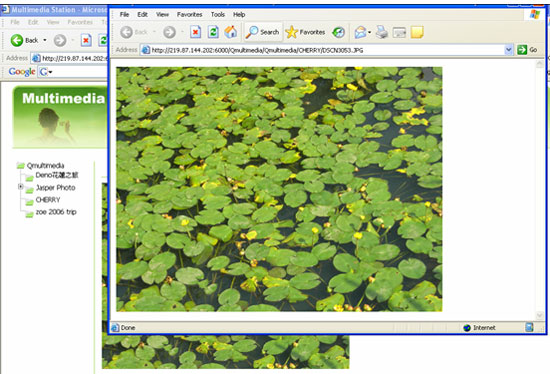
To open the original file, click on the photo and the photo will be opened in a new browser.
The operation interface of these structural photos, thumbnails and photo details are automatically generated by Turbo Station after uploading the photos. This provides great convenience for users to manage the albums. In addition, the photos on Turbo Station can be easily accessed in local LAN or from the Internet.
Conclusion
Backing up digital photos by Turbo Station, users can enjoy extra data protection as well as a web album which is easy-to-share and browse. Moreover, Turbo Station’s energy-saving, fanless, and aluminum alloy case design enable absolutely silent and stable performance. It is an ideal choice for home and small office.