PHP & MySQL to Create a Forum
How to Use PHP & MySQL to Create a Forum on Your Turbo Station :
Think it’s difficult to own a forum? Now, you can create your forum by Turbo Station. Follow the steps below and you will find out how easy it is.
|
 |
||||
Chapter I. Enable Web server and MySQL on your Turbo Station
First, enable web server and MySQL server. You can then use the built in MySQL management tool- phpMyAdmin.
 Make sure your Turbo Station is ready.
You can use QNAP Finder to configure Turbo Station step by step. Then, login Turbo Station.- Make sure Web Server and MySQL Server are enabled.
Follow the steps below to enable MySQL Server.
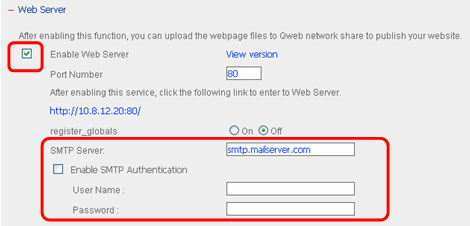
A. Go to Web Server of Network Settings, enable the Web Server function and input your SMTP Server. You can also enable SMTP authentication for your mail server when necessary.
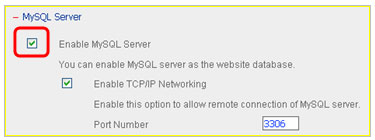
B. Go to MySQL Server of Network Settings and enable MySQL Server.
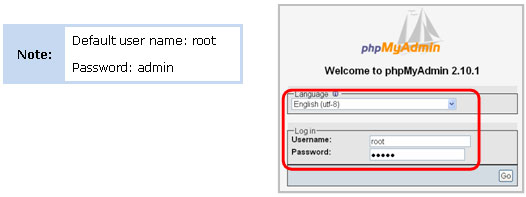
Note: If you do not find the phpMyAdmin link on MySQL Server page, please go to www.qnap.com to download the NAS firmware with built-in phpMyAdmin. Then upgrade your server with the new firmware. - Access MySQL server by phpMyAdmin
A. Go to the built-in phpMyAdmin page http://”Turbo Station IP Address”/phpMyAdmin/ (phpMyAdmin is the default folder name in Qweb); and enter the user name and password to login. You can also select your local language.
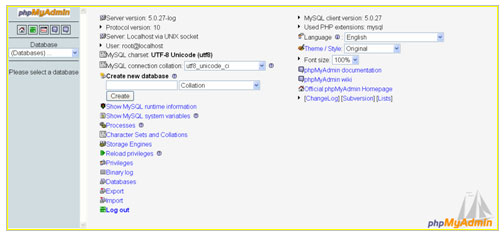
B. After login successfully, you can enter the phpMyAdmin management page as shown below.
Chapter II. Manage MySQL database by phpMyAdmin
After login phpMyAdmin, you should know how to change the root password, create a database, and add users to the database.
- Change root password
Change your root password to secure your database as shown below.
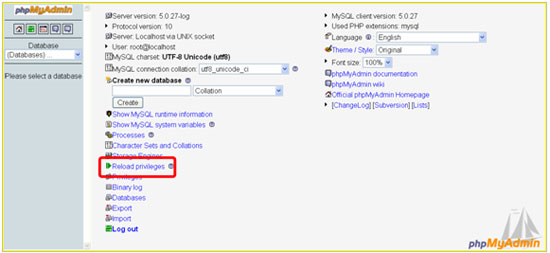
A. Click in phpMyAdmin management page to edit Privileges of root.

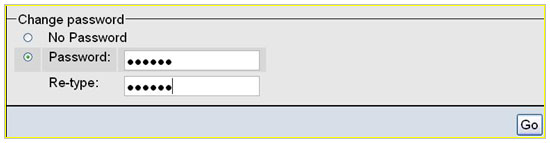
B. Click to edit the password of root in localhost. Click
 to save the changes. You should use the new password to login afterwards.
- Add a database user
You can create a database user for specific database and define the privileges of the user.
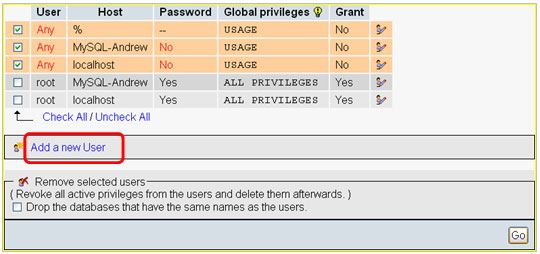
A. Click in phpMyAdmin management. Then, click “Add a new User“.
B. Input the user information. Then, click to complete.
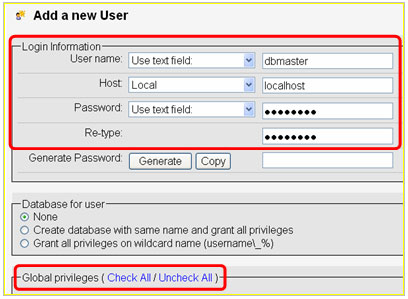
Note1: regarding Host:
There are four options when you click on the drop-down menu of “Host“, which are Any Host, Local, user host table, use text field. Any host shows the default setting “%“; Local shows the default setting “localhost“; user host table allows users to enter IP address or domain name. For general use, “localhost” is recommended, because “localhost” is only for connection of this NAS server. If you choose user host table and input IP address or domain name, that means this user can access the server remotely from that IP address or domain name.
Note2: Do not check all items in Global privileges unless you want to use this new user account instead of “root“. - Add a database
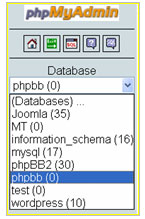
A. Input a database name, e.g., phpbb as shown below. Click to create a database.
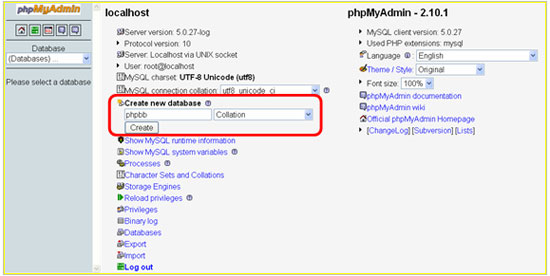
B. The database has been created on the list.
- Configure database user in a database
A. Click to return to phpMyAdmin homepage. Then click to edit user’s privileges.
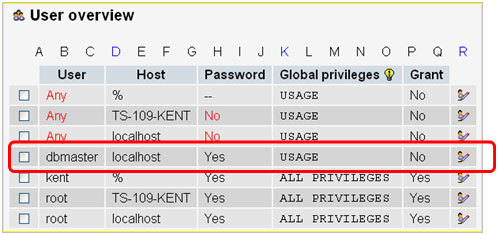
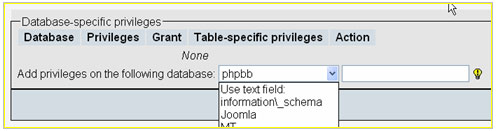
B. Click to edit the privileges of the dbmaster. Find the “Database-specific privileges”.
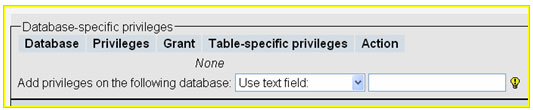
C. Select the database, e.g., phpbb. The next page is shown automatically.
D. Select privileges for data, structure, and administration. Then, click to complete.
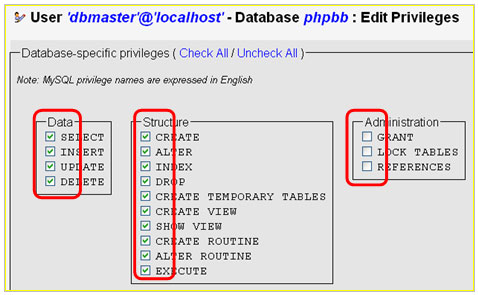
Note: For common use, it is recommended to check the “Data” and “Structure” items in Database-specific privileges.
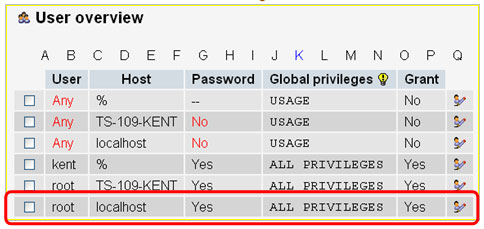
When you have successfully set a user’s privileges for this database, the following message is shown.

Chapter III. Install PHP + MySQL forum on Turbo Station
Right now, you can easily build a PHP+MySQL forum on Turbo Station, e.g., phpbb. Let’s use phpBB for practice below.
- Upload phpBB Files
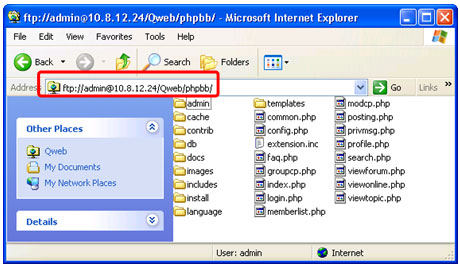
A. You should download the phpBB program first. You can download it directly from this URL: http://jaist.dl.sourceforge.net/sourceforge/phpbb/phpBB-2.0.22.zip. If you want to know more information or download other versions, please refer to http://www.phpbb.com.B. Create a folder under the “Qweb” network share folder, e.g., phpbb. Extract the downloaded files to the folder, e.g., Qweb/phpbb via FTP as shown below.
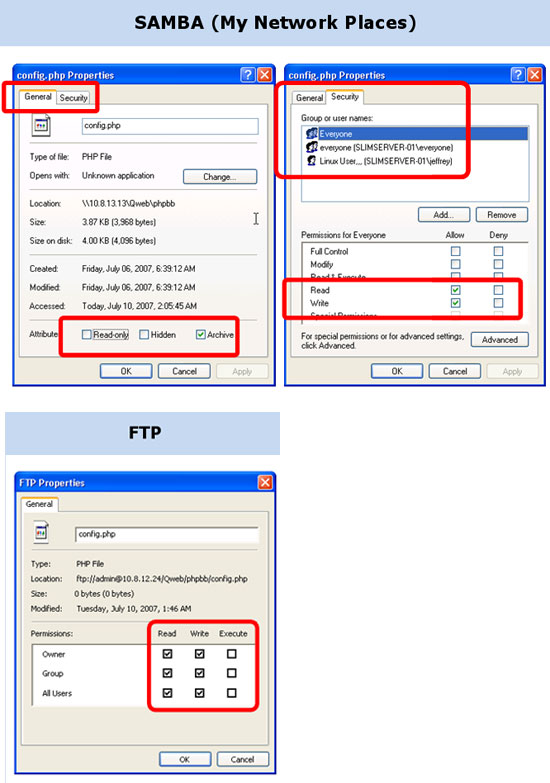
C. Make sure the permissions of the Qweb/phpbb/config.php file is “read” and “write”. You can configure the permission by FTP or SAMBA (My Network Places).
- Install Your phpBB
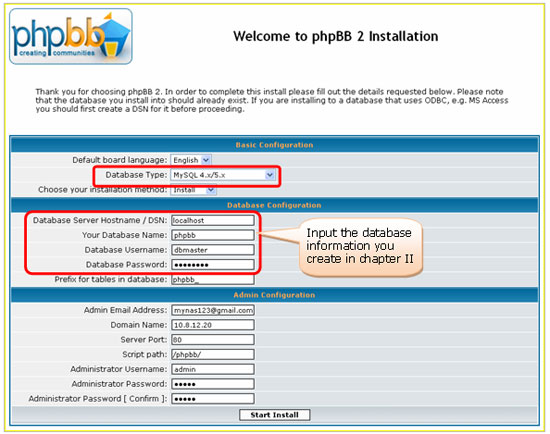
A. Go to the phpBB Page in http://”QNAP NAS server IP Address”/phpbb/ (phpbb is the name of the folder created to upload all extracted phpBB files) and install it. Input all the necessary information, and click .
.
B. Click “Finish Installation“.

C. After installation completes, delete or rename the /Qweb/phpbb/install/ and /Qweb/phpbb/contrib/ directories.

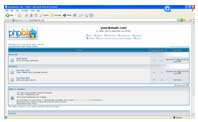
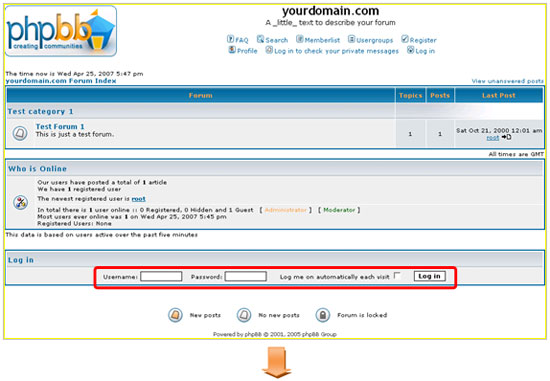
- Go to Your phpBB Website
Go to the phpBB page http://”QNAP NAS server IP Address”/phpbb/ to access your forum. Login as the administrator to manage your forum.
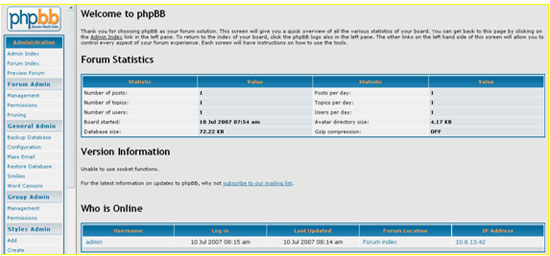
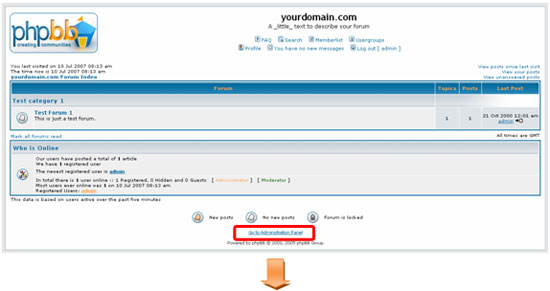
Login as an administrator, and then click Go to Administration Panel.
You can manage your forum over here!